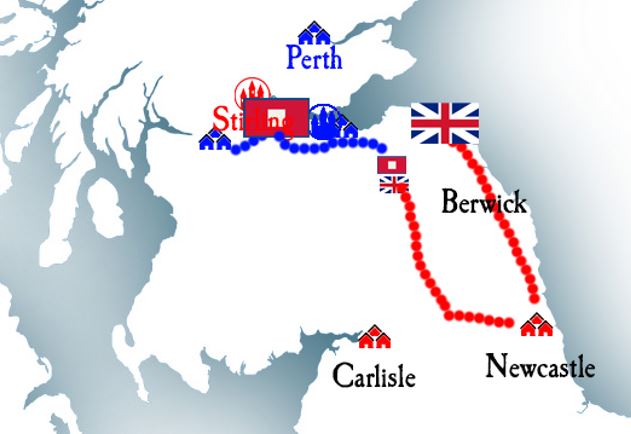
Reaching Newcastle with a substantial force, Marshal Wade decided to take the initiative away from the Jacobites by marching his army into Scotland. Wary of a sudden Jacobite thrust towards Carlisle, however, he detached a cavalry brigade to Hexham first, to cover his inland flank. Command of this force was given to Sir John Cope, in the hope he might redeem himself from the stigma of defeat at Prestonpans. As Wade moved north along the coast road through Berwick, Cope took the inland route over Redeswire, through Jedburgh and on towards Lauderdale.
The Jacobites voted on how to respond, whilst summoning all their available ungarrisoned regiments to Stirling. There were many voices in favour of seeking an immediate battle with Wade, but an alternative was proposed by one of our social media followers: a flying column to attack Cope and turn the tables on Wade, threatening his flank. This was the winning option, and a column was duly prepared which contained 4S units of cavalry and 3R units of infantry. Despite his recent successes, command was not given to Tullibardine as his recent campaigns had affected his health. Instead his brother, Lord George Murray, took the command.
Murray moved rapidly from Stirling to Edinburgh, then down from Dalkeith towards Lauder. Cope reached that town first however, and his cavalry detected Murray’s approach. He therefore sought orders, the vote determining that Cope should press on with his 2R dragoons, 1R mounted militia, and 1R Dutch Horse.
The resulting engagement took place on the moorland to the west of Dere Street, below the old medieval hospital at Soutra Hill, on 10 November 1745 (on our calendar, 12 March 2023!).

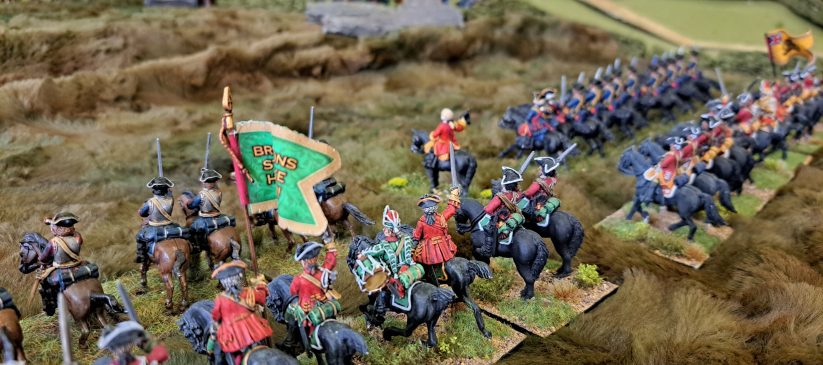
TURN 1: The Jacobites took up position on the ridge, with the infantry under Murray on the left and the cavalry under Elcho on the right. Cope arrived and deployed his whole force in front of the Jacobite cavalry, hoping to quickly overwhelm its smaller squadrons.
TURN 2: The Jacobite infantry advanced towards the approaching cavalry and angled to outflank the smaller force. A blazing volley into the right of Cope’s front line disordered his Dutch horse, the heaviest of his cavalry. The Jacobite cavalry advanced and the front line gave an ineffective fire from the saddle. Cope’s Northumberland Mounted Militia charged Bagot’s Hussars, who counter-charged despite the disparity in numbers. Hamilton’s Dragoons overtook the Dutch to charge Strathallan’s squadron, who also counter-charged. The Northumberlands were beaten in the resulting combat, falling back in disorder. Bagot’s Hussars opted for a sweeping charge in their wake, crashing into Ligonier’s Dragoons. This was a risk – a small unit attacking a larger one – but it was calculated to deny support to Hamilton’s Dragoons in the centre.
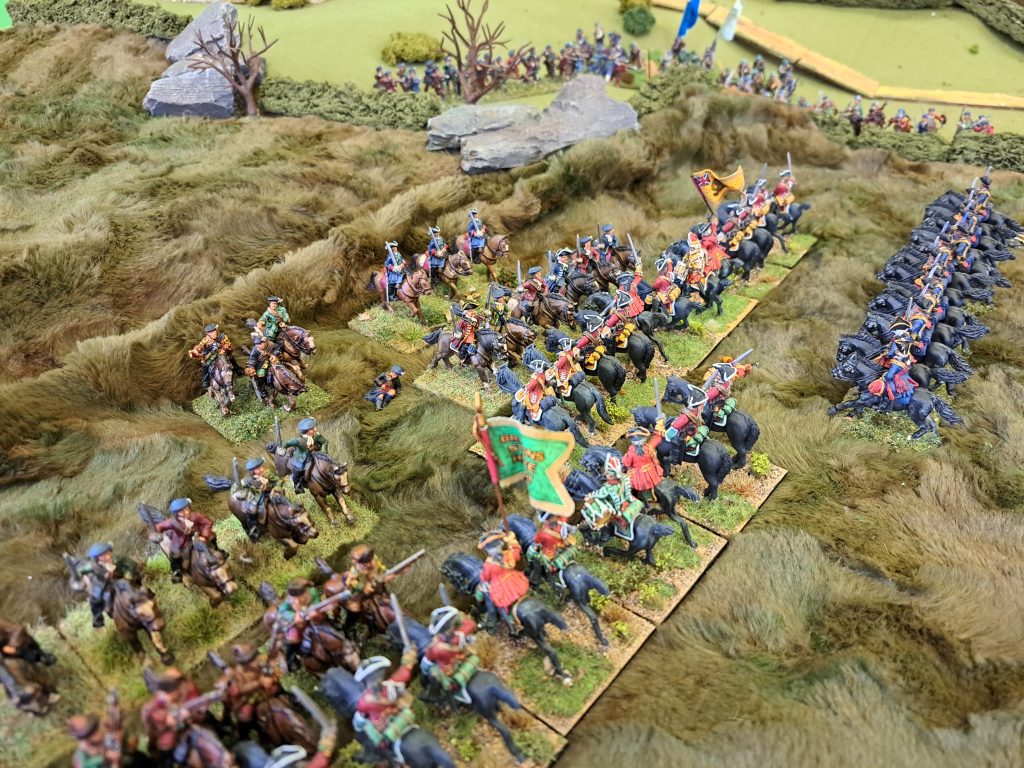
TURN 3: The Jacobite infantry again poured muskery into the Dutch horse, and again succeeded in disordering them. With Hamilton’s Dragoons denied support from either the rear or the left, they were routed by Strathallan’s smaller squadron, who were supported both to rear and right. Ligonier’s Dragoons succesfully drove off Bagot’s Hussars, but the latter had already achieved their objective and survived unbroken, just shaken and disordered.
TURN 4: Strathallan’s squadron boldly charged the Dutch horse, denying the latter the chance to charge now that they had recovered from the disorder. Fearing their higher hand-to-hand values however, the clansmen of Clan Cameron were sent in on the Dutch flank to ensure the attack succeded… which it did not! Strathallan’s were driven back in disorder, as did the Camerons. Meanwhile, Pitsligo’s Horse had successfully driven back Ligonier’s who fell back in disorder to the position of the Nortumberland militia back beyond the stream.
TURN 5: The Jacobites blasted the Dutch horse with musketry from two sides, whilst Elcho’s Lifeguards harassed them with carbine shots, forcing so many casualties that the unhappy regiment broke and fled the field. Sir John Cope had remained with them until the end, but managed to reach the two remaining shaken regiments and, now that they had recovered their disorder he retired them from the field.

The Jacobites ended the battle with three shaken units but none broken. Their victory outcome roll determined that all three recovered their losses. Cope retreated with just two of his four units remaining, both shaken. His outcome roll determined that both were reduced to half units during the retreat. They withdrew first to Lauder and thence towards Marshal Wade in the east.
On Cope’s arrival, Wade halted his advance into Scotland at Dunbar. Fearing that the whole Jacobite army might now come at him, and that it was now impossible for him to relieve Stirling, he ordered his army to entrench at Dunbar and await further orders.
Three days later, Stirling Castle surrendered to the Jacobites…
However, far to the south, the Duke of Cumberland has completed the formation of a second army drawn from his forces in Europe.
Will Wade now fall back towards that support, or will Cumberland come up fast enough to keep the war inside Scotland?
Will the Prince now move against Wade’s main army, or will he finally make his dash to the border?
You can watch a full analysis of the latest campaign developments on our “What If?” YouTube playlist: