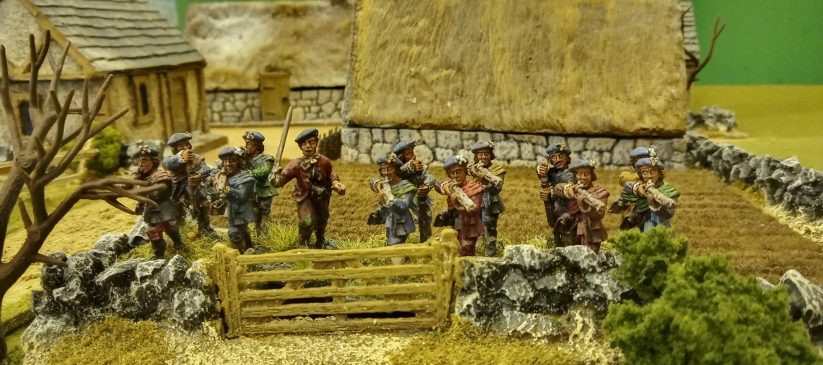
Our last campaign update left the Earl of Cromartie about to cross the Moray Firth, and the Earl of Loudoun marching out of Inverness to intercept him. The intercept roll determined, however, that Cromartie would detect Loudoun’s approach in time to prepare a defence. Accordingly, after successfully disembarking his regiment, Cromartie divided his force into two (for intercept games, we use a rule which allows 1R unit to divide into 2S units). The first section took up a position in a walled enclosure on the edge of the village of Blacktown; the second occupied the inland kirkyard of Ardersier. These positions created a mutually-supporting field of fire commanding the only road by which Loudoun could approach.
TURN 1: Loudoun arrived in column and, detecting the situation, successfully ordered his regiment to divide into two sections to match the enemy’s formation.
TURN 2: Loudoun’s first section advanced on Ardersier kirk, keeping out of the range of the village. This was wise, as a failed order meant the second section did not advance far enough to screen their flank. Although both sides took early hits, Loudoun’s men were disordered by the first Jacobite volley.
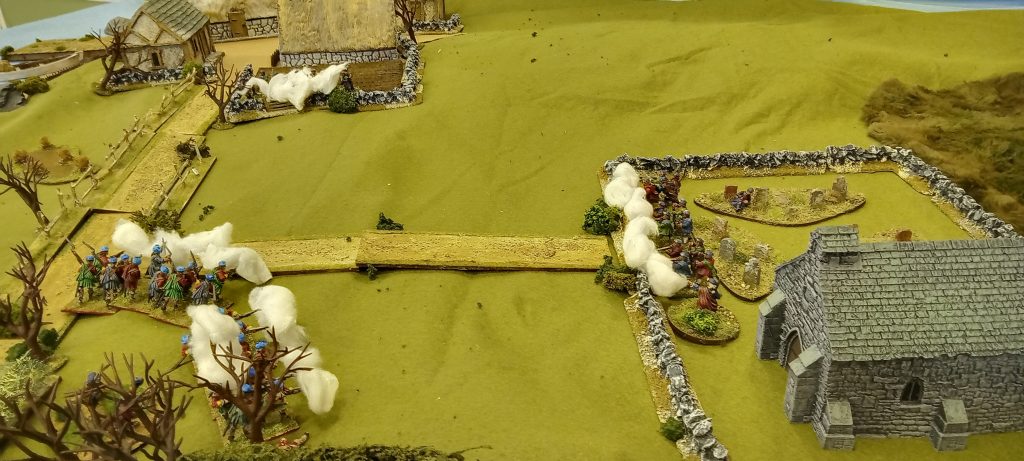
TURN 3: Loudoun’s second section finally advanced towards Blacktown and deployed into line, opening an effective fire on the defenders there.
TURN 4: Disadvantaged by being in the open, Loudoun’s first section advances to close range but the musketry from both sides is ineffective.
TURN 5: Jacobite casualties begin to mount in the kirkyard, leaving the men shaken.
TURN 6: Loudoun’s second section also advances to close range, but suffer heavy casualties from the resulting Jacobite volley.
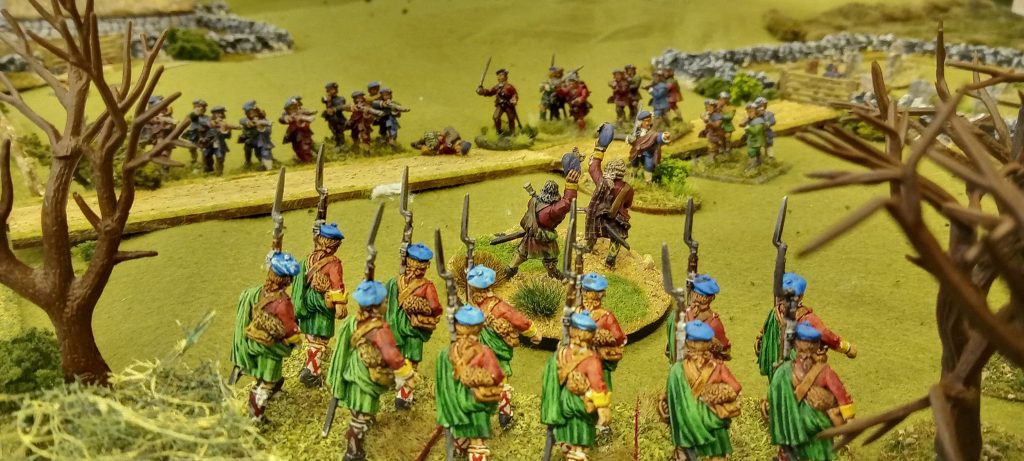
TURN 7: Conscious that he needed these men to hold Inverness, Loudoun attempted to withdraw his shaken men from in front of Blacktown. But there was a blunder, and instead his Highlanders attempted to charge Cromartie in the enclosure. The Jacobites fought back hard, winning the combat and eventually shattering Loudoun’s section.
TURN 8: Loudoun’s force outside the kirkyard was too disordered to withdraw, although they were now isolated and outnumbered. Comartie’s men from Blacktown poured a devastating volley into their flank, shaking them. But Loudoun’s men refused to break.
TURN 9: Loudoun’s men begin a fighting withdrawal, caught in the crossfire of two Jacobite sections. The pass a second break test, but their musketry is faltering now.
TURN 10: Cromartie’s men leave their walls to push Loudoun back, inflicting further casualties – but the latter pass a further break test.
TURN 11: At last, exhausted and still unable to reach a position of safety, Loudoun and his men surrender to Cromartie.
As a result of the engagement, Cromartie is able to sweep into Inverness and force the surrender of the skeleton garrison at Fort George. Loudoun is taken prisoner but released on parole. Cromartie, abandoning his original mission to march to Stirling, occupies Fort George and assumes responsibility for holding the north for the Prince. This frees Tullibardine, then at Tirnadrish, to respond to pressures elswhere…
LOCATION NOTE:
In real life, this engagement would have taken place in the area where the later (and still extant) Fort George was constructed. The fort itself was built on the site of Blacktown village, with the settlement being moved to the site of modern Ardersier. The old kirk, just inland, is no longer standing but its walled churchyard can still be seen.