Our last update reported that MacLeod’s Highlanders had been raised for the Government at Inverness, and that a determination roll had ordered them to march to Fort William. Here they could potentially cut off the Jacobites in Edinburgh from recruits in the western Highlands. The Jacobites therefore held a Facebook poll over whether to order Tullibardine, then at Blair Castle with 2 regiments, to march rapidly to intercept MacLeod. The vote was unanimous, and Tullibardine set off the next morning. By 4 October he had reached Tirnadrish near High Bridge, following Wade’s Road to cut off MacLeod’s march on its final day. This brought them close enough to Fort William to activate an Intercept roll: the dice determined that the garrison would march out with enough time to prepare an advantageous position.
Early on 5 October, Tullibardine set out to meet MacLeod, but found the Fort William garrison threatening his flank at Highbridge…
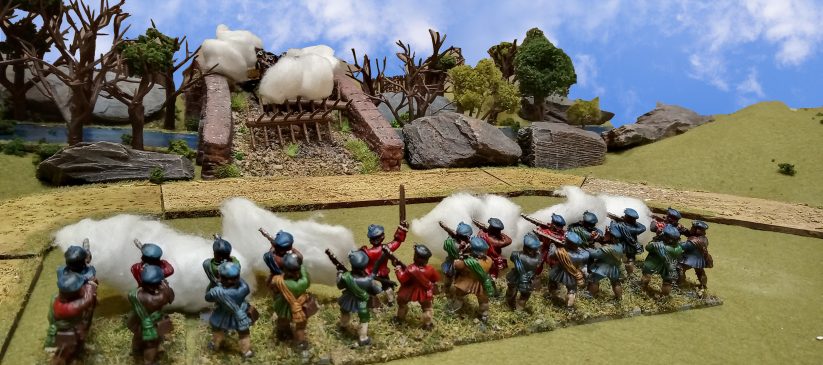
TURN 1: Cluny’s Highlanders surged off in column to intercept MacLeod (due to arrive at Turn 3), but a failed order roll meant 3/Atholl Brigade did not move up quickly enough to screen them. The companies of Guise’s Foot at Highbridge fired into their flank and inflicted 2 casualties.
TURN 2: Cluny successfully marches up the road towards Loch Lochy, and the Athollmen successfully move up and deploy into line before Highbridge. Their initial volley is, however, in effective.
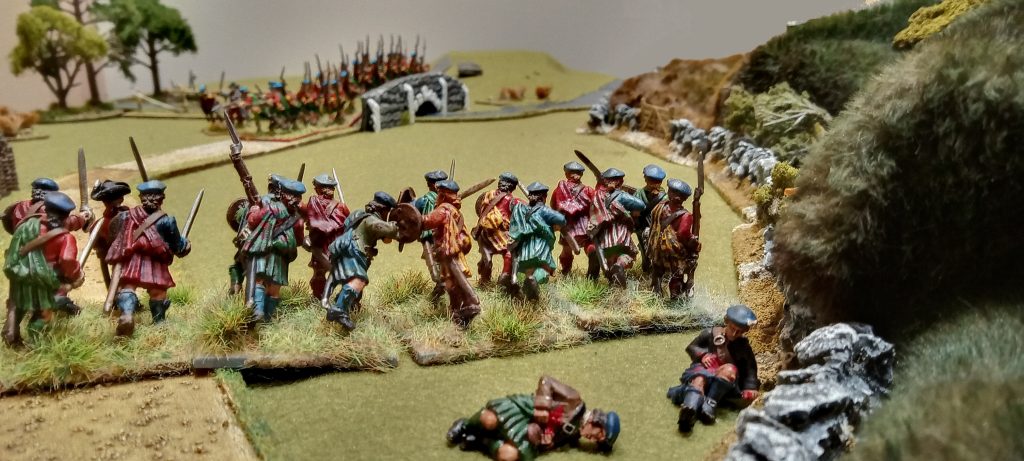
TURN 3: Cluny’s men fail their order roll, and in fear of their being caught in column when MacLeod arrives Tullibardine leaves the Athollmen alone and takes personal charge of the Highlanders. The firefight at Highbridge continues, with the bridge and barricade neutralising the Jacobite advantage in numbers. MacLeod reaches the edge of the battlefield.
TURN 4: MacLeod reaches Nine Mile Bridge but remains in column ready to cross. Cluny’s men get only one move, so form line. Anxious about their existing casualties, they keep well clear of the bridge to encourage MacLeod across. The firefight at Highbridge continues with casualties on both sides.
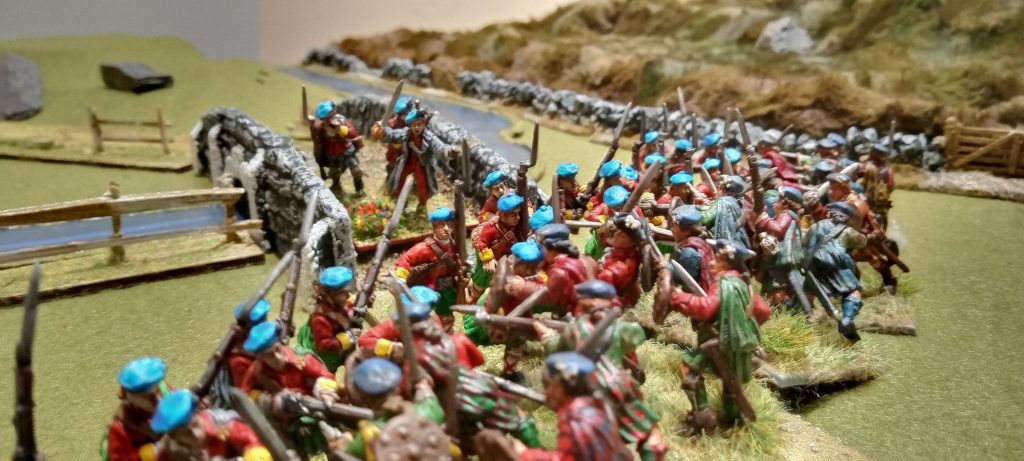
TURN 5: Cluny’s men move to the outer limit of musket range from the bridge. MacLeod crosses and forms line, firing an ineffective volley and opening a window for Cluny to charge…
TURN 6: Cluny’s men charge MacLeod, and their terrifying charge bonus forces a break test. MacLeod passes the test and his regiment holds its ground. At Highbridge, both units reach their stamina level.
TURN 7: The Athollmen have a disappointing shooting round, but the Fort William garrison dares not risk needing a break test so determines to withdraw unhindered. (If they had been broken on the field, the outcome rolls might have obliged them to abandon the fort). The Jacobites finally drive MacLeod back in hand-to-hand clash at Nine Mile Bridge, and the river prevents the latter from withdrawing to reform. MacLeod’s men break.
The outcome rolls determine that MacLeod’s Regiment is permanently lost and he himself is wounded, but the Fort William units retire intact. The Jacobites are so exhausted by their exertions that Tullibardine will remain on the field with his men for four days to recover. Both Jacobite units ended the battle shaken, but will fully recover.
Elsewhere in the campaign, Glenbucket’s small regiment marches to Blair Castle, only to find Tullibardine has already gone. He follows in his wake and will link up at Tirnadrish in a couple of days.
The siege of Edinburgh Castle continues, with the garrison firing on the weak Jacobite siegeworks and damaging a number of houses. Nevertheless, morale and supplies are under pressure within the walls…